As part of our Solo Summer Drill Series, we’re providing drills that can be done over the summer individually with limited equipment — use these drills to compliment your summer workout packet so you’re ready for the fall season!
The Free and Clear(s) drill is designed so that goalkeepers can work on their technical skills with or without a partner. Get creative in making it game like or providing targets or focuses for yourself. If you can, film yourself so you can assess your body positioning and agility in your pads.
Phase 1
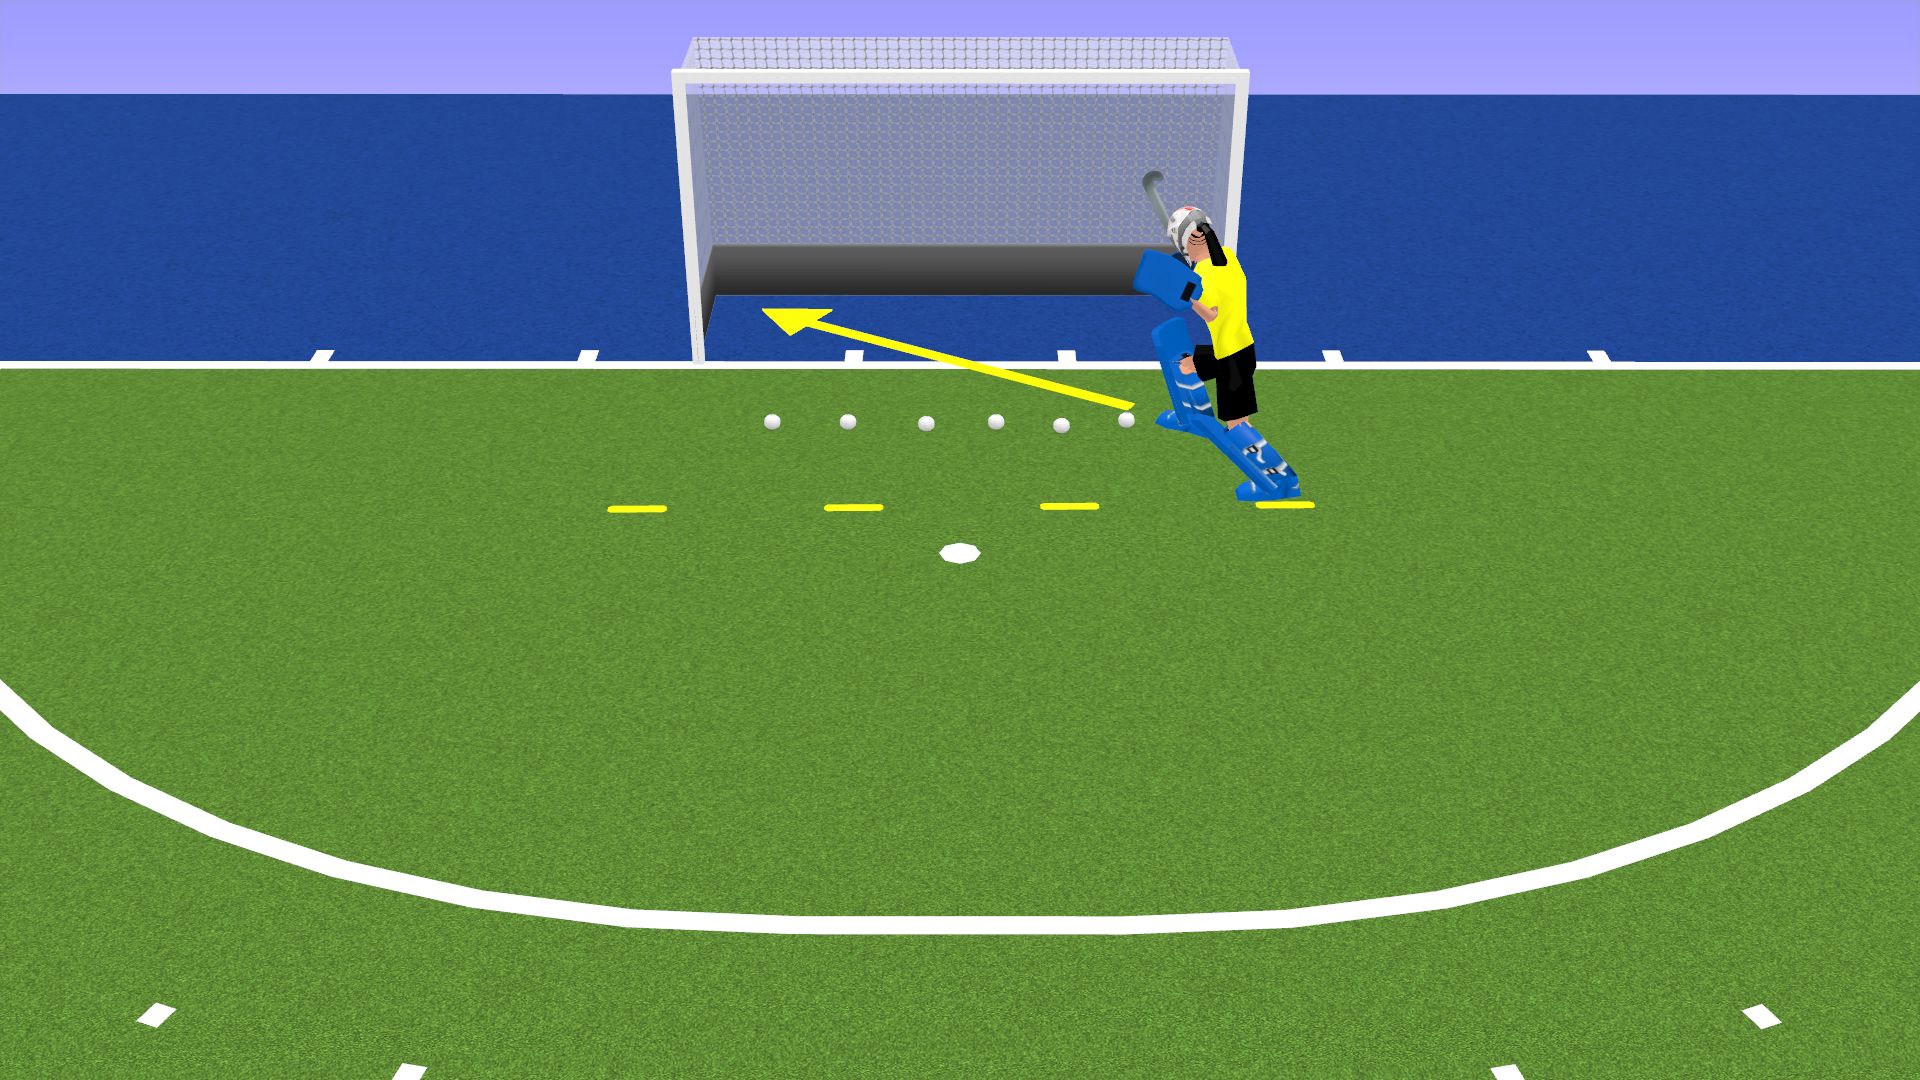
Free and Clear(s) — Phase 1
Set-Up: All you need is at least six balls (more is always better), a few cones (or a line on the field will do), and a goal cage. Set up a line of six balls about one yard off of the baseline, create a line of cones five yards away and parallel to the baseline.
The Drill:
- Starting on the five-yard line approach the first ball and clear it into the cage
- Shuffle to return to the five-yard line, then approach the second ball and clear it into the cage
- Continue until all of the balls have been cleared
- Reset your balls and do the same thing in the opposite direction using your other foot
Points of Emphasis:
- Work on connecting with the “meat” of your kicker or the large flat area in the middle of your foot, avoid connecting with your toe
- Push off of your plant leg to get power in your clear — think about how close you need to be to the ball to get power in your clear, in most cases, the closer you are, the weaker your clear will be
- Keep your shoulders and head over your knee to keep you body weight forward and over the ball
- Encourage yourself to keep a low body position when you’re shuffling back and forth between the ball and the five-yard line, avoid moving up and down
Recommendations:
- Pick an area of the cage to aim toward — a great spot is the corner where the boards meet. You can even put a piece of tape on the board or a cone to make a clear target
Phase 2
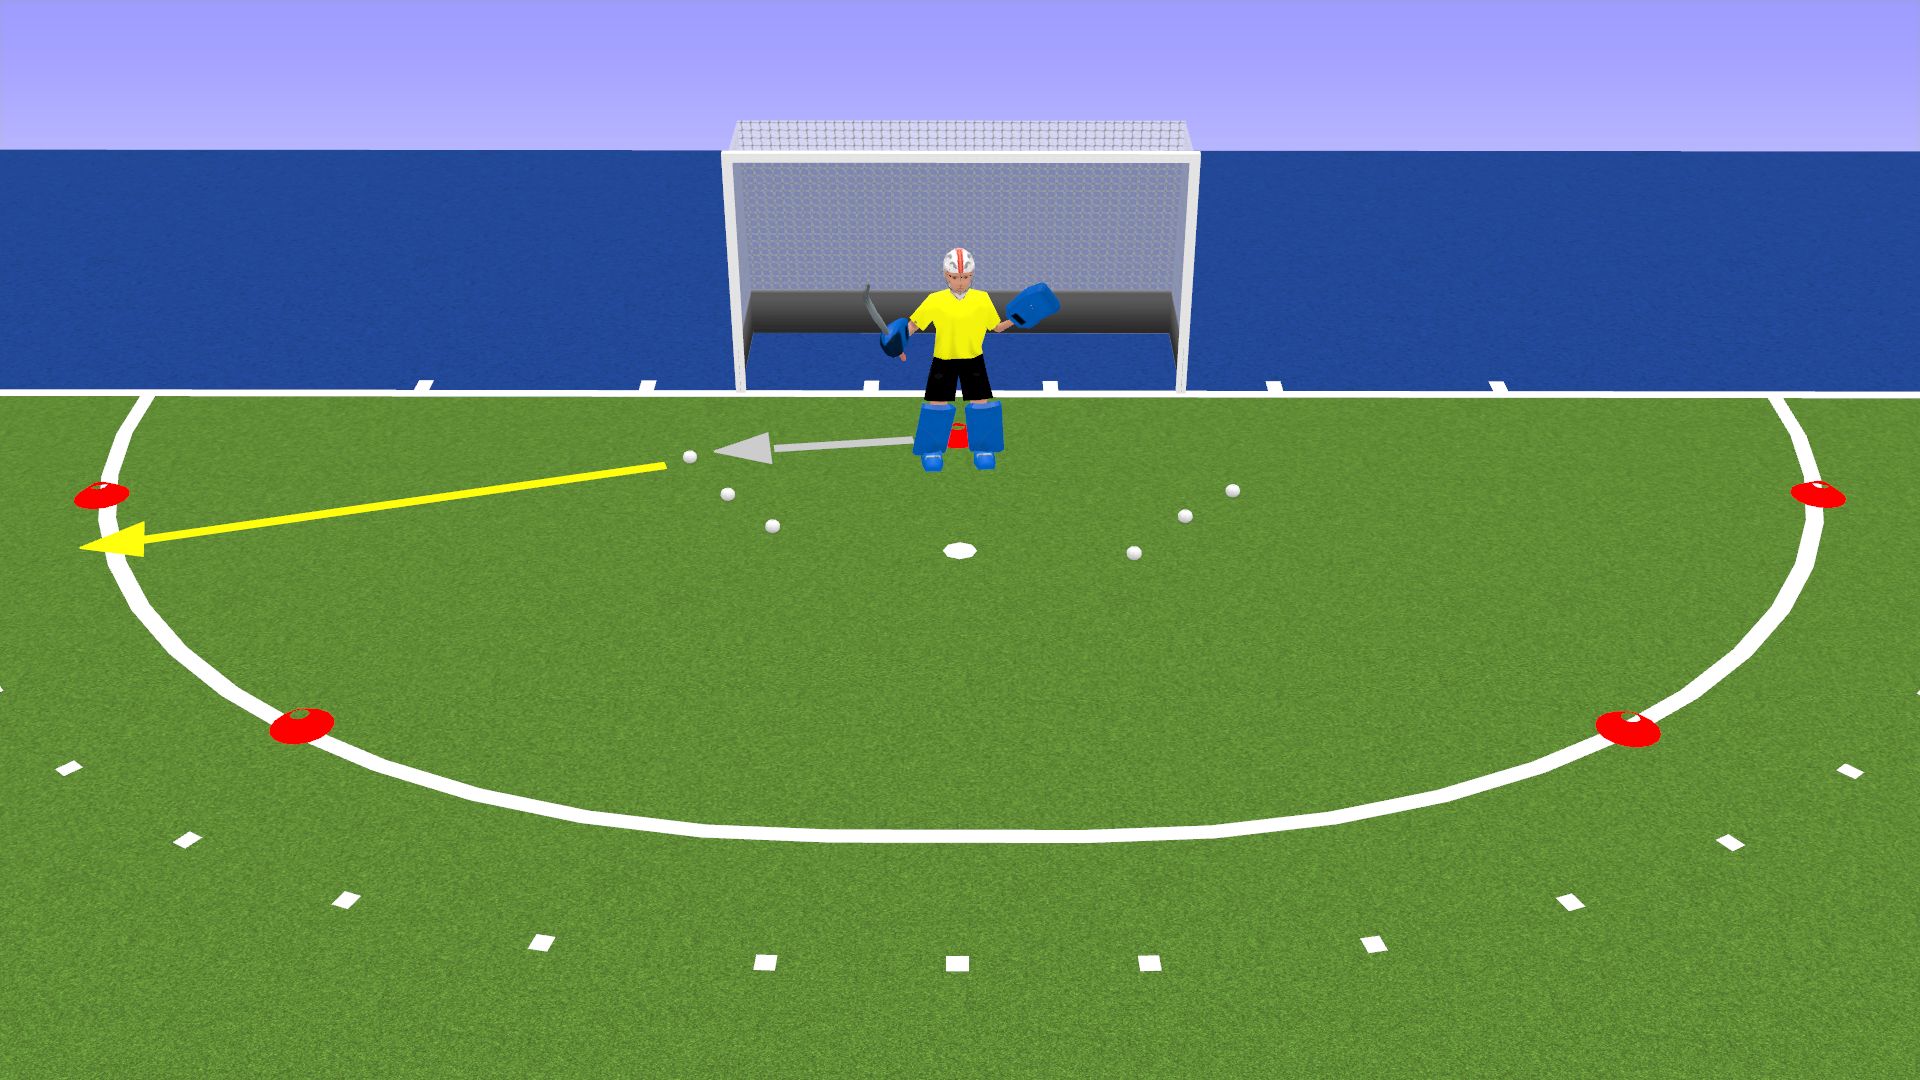
Free and Clear(s) — Phase 2
Set-Up:All you need is at least six balls (more is always better). You can do this with or without a goal cage, but having a circle and a goal cage will help you work on your positioning in the circle. Set up a line of three balls at an angle, on each side of the stroke mark. They can be about three yards away from you.
The Drill:
- Start in the middle of the cage about two yards off of the baseline
- Approach the lowest ball on the right-hand side and clear it through the gates
- Return to your starting position and pause
- Approach the lowest ball on the left-hand side and clear it through the gates
- Continue alternating sides until you’ve cleared all the balls
Points of Emphasis:
- Work on connecting with the “meat” of your kicker or the large flat area in the middle of your foot, avoid connecting with your toe
- Push off of your plant leg to get power in your clear — think about how close you need to be to the ball to get power in your clear, in most cases, the closer you are, the weaker your clear will be
- Keep your shoulders and head over your knee to keep you body weight forward and over the ball
- Encourage yourself to keep a low body position when you’re shuffling back and forth between the ball and the five-yard line, avoid moving up and down
Recommendations:
- Set up gates or targets on the circle to help measure your accuracy
- Set up the balls closer or farther away depending on what you want to focus on. Want to work on pushing off your plant leg? Position the balls closer so with one step you can connect with the ball. Want to incorporate fitness or more agility? Put the balls farther away so you have to take several steps to meet the ball.
- Place a cone at your starting position if you need a reminder to pause between clears
- For more of a challenge, make the gates smaller or add extra gates to aim at based on the ball position
Phase 3
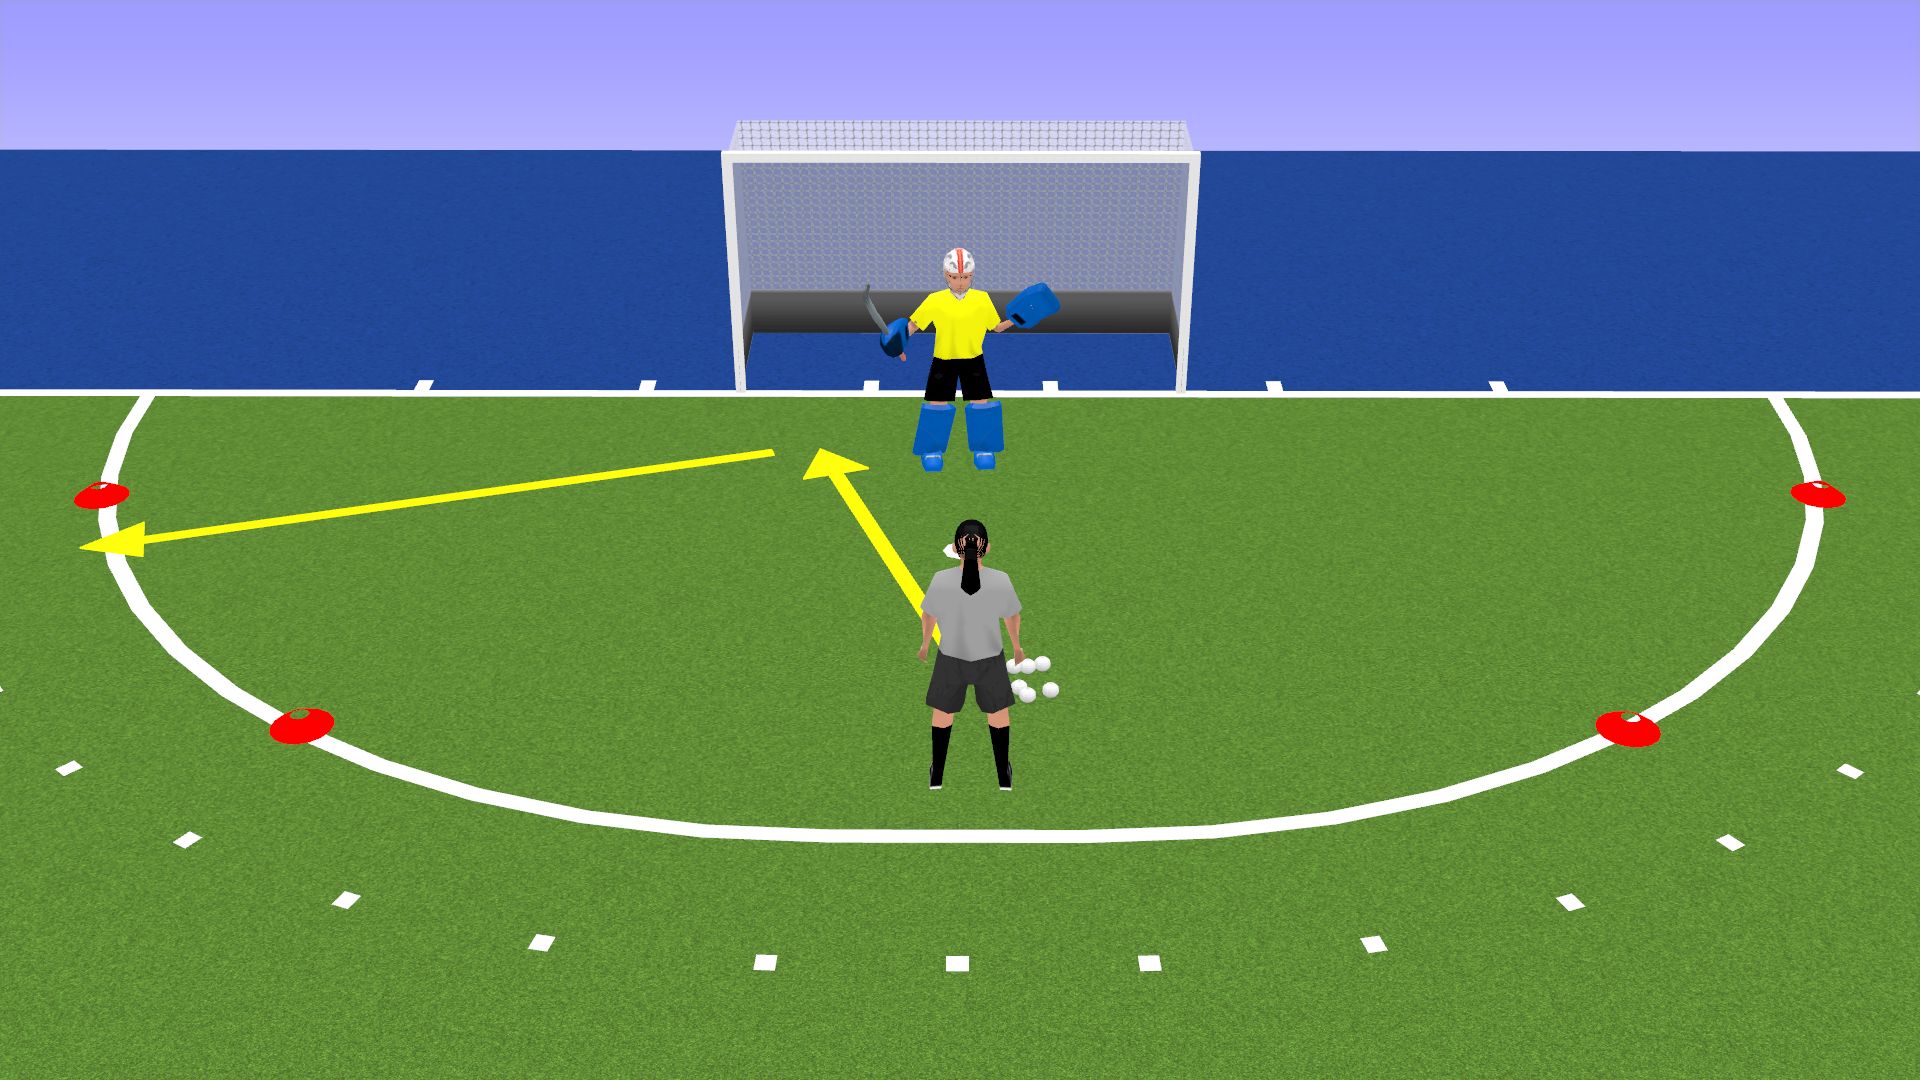
Free and Clear(s) — Phase 3
Set-Up: All you need is at least six balls (more is always better) and partner that can roll or pass the ball. Have four cones to set up gates on the edge of the circle.
The Drill:
- Have your passer roll or pass the ball to the corner of the cage
- Clear it through the gates
- Return to your set position for the next ball
Start by doing 6-8 balls on one side only, then do it on the other side. After you’ve done that, do a round where shots are alternating sides.
Points of Emphasis:
- Work on connecting with the “meat” of your kicker or the large flat area in the middle of your foot, avoid connecting with your toe
- Push off of your plant leg to get power in your clear — think about how close you need to be to the ball to get power in your clear, in most cases, the closer you are, the weaker your clear will be
- Keep your shoulders and head over your knee to keep you body weight forward and over the ball
- Encourage yourself to keep a low body position when you’re shuffling back and forth between the ball and the five-yard line, avoid moving up and down
- Challenge yourself to get the ball through the gates
Recommendations:
- For more of a challenge, make the gates smaller or lower on the circle
- Have your shooter start with the balls aimed at you, then have them shoot the balls farther away from you for more of a challenge
- Place a cone at your starting position if you need a reminder to pause between clears
- Take it to the next level, add a pass back to the shooter before your clear — the shooter passes directly to you, you kick the ball back to them, then they shoot for the corners, and you must clear the ball through the gates


